Subjects
Management Panel
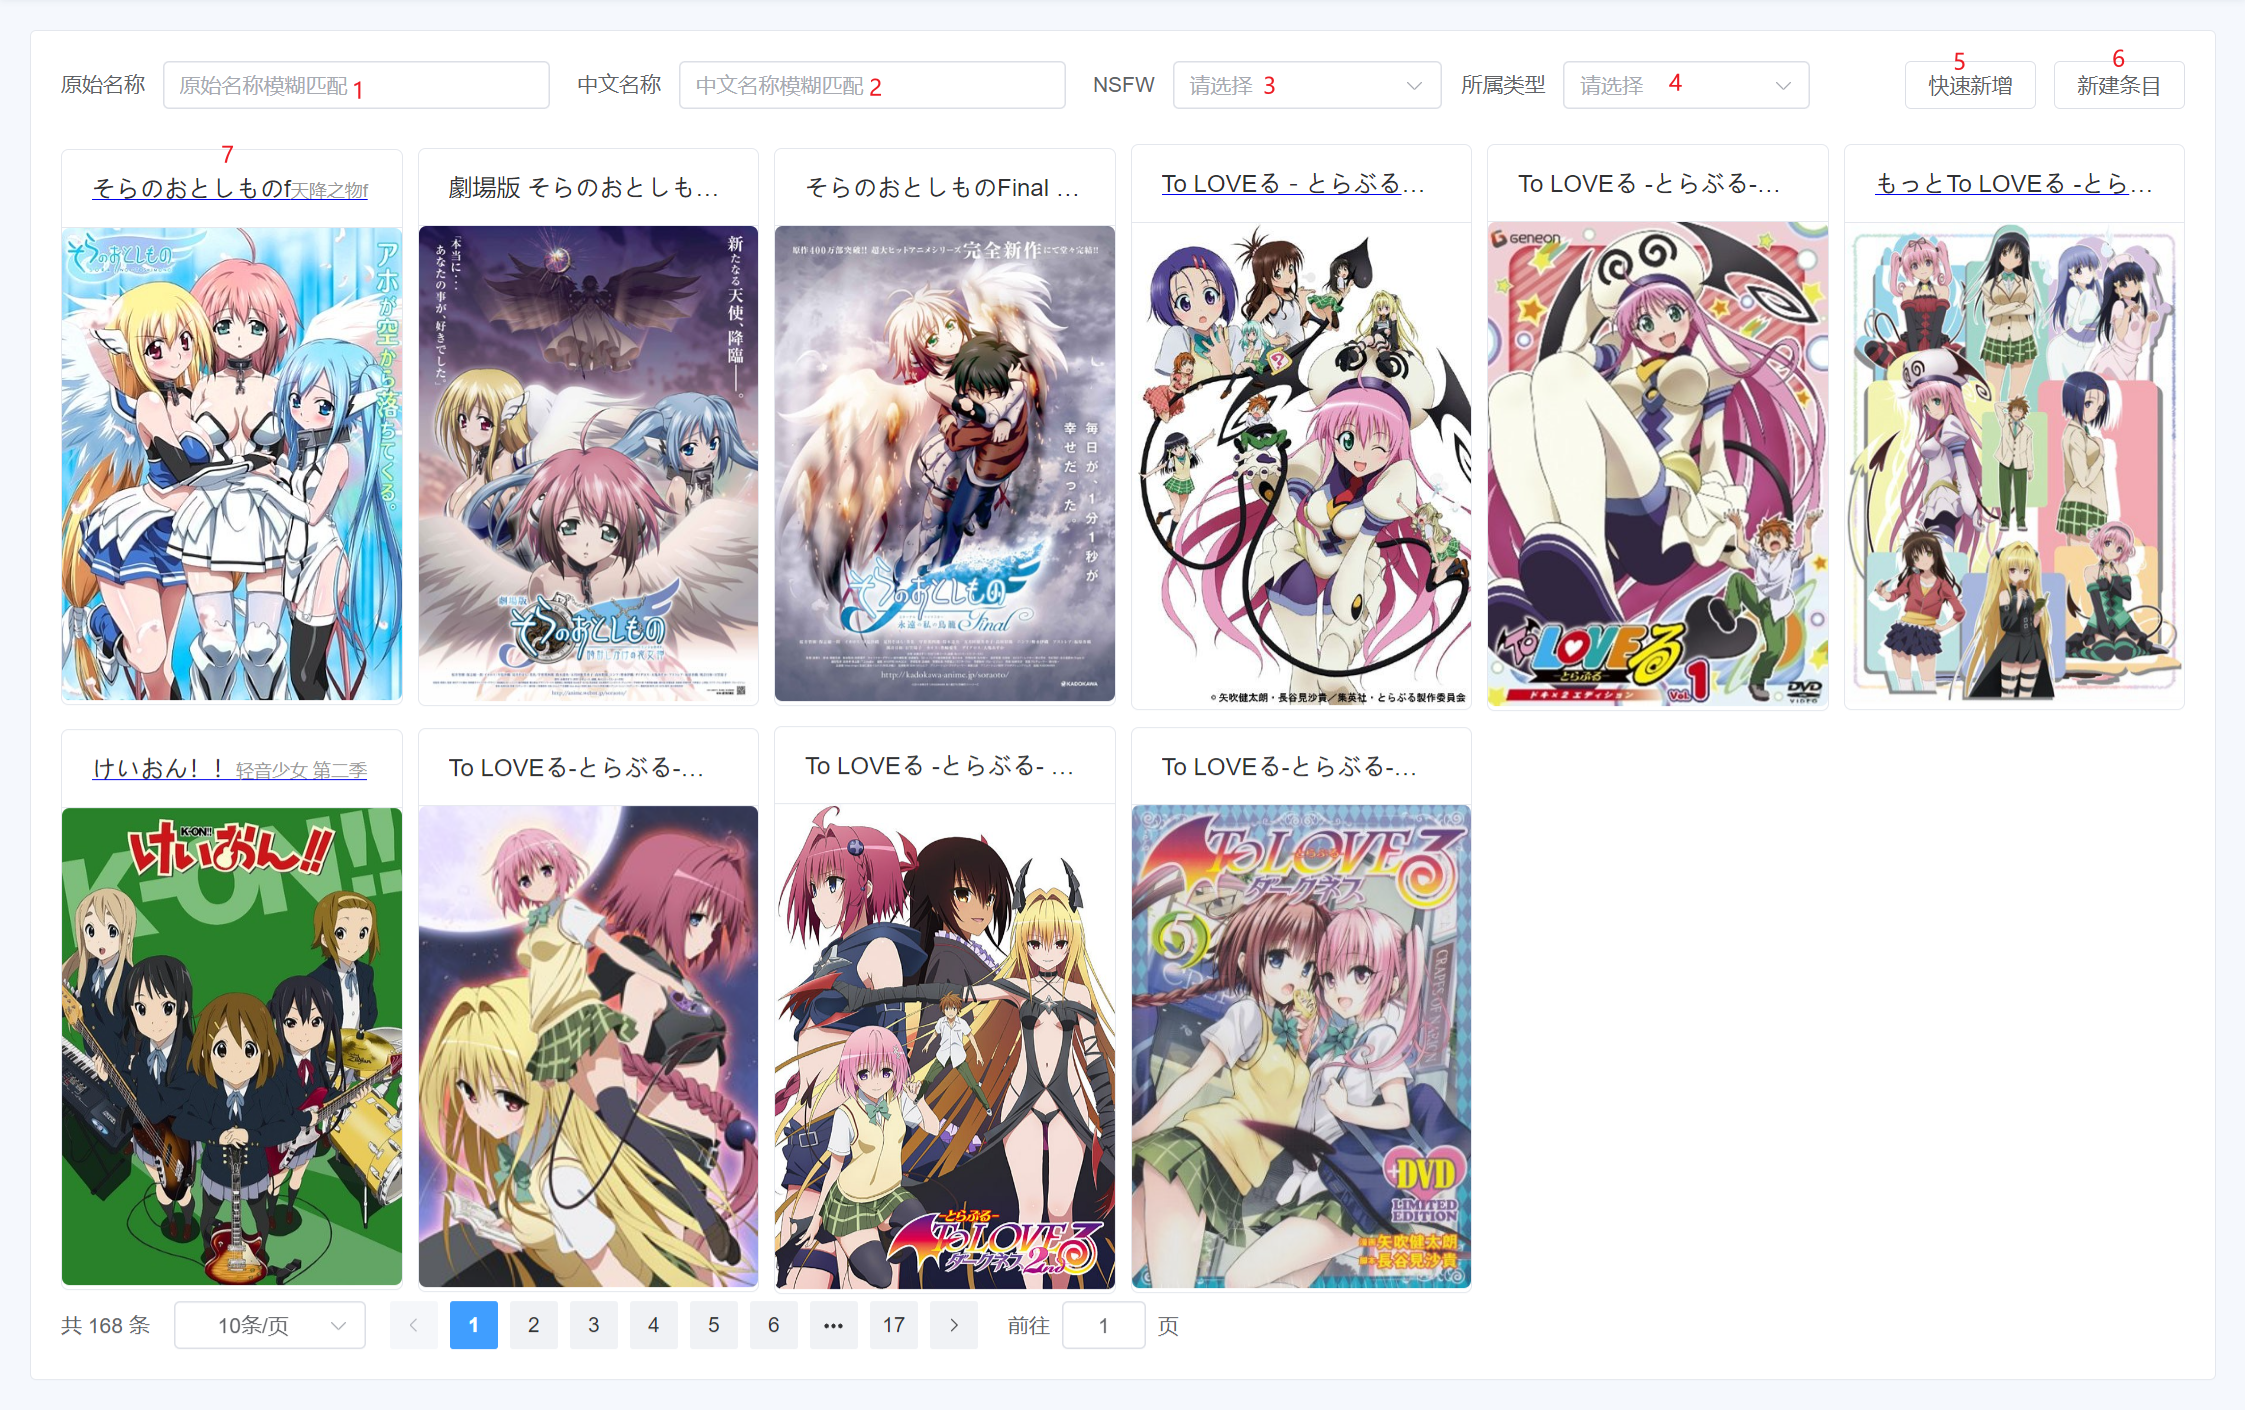
- 1: Enter the original subject name and press Enter to search. The original name is generally in Japanese.
- 2: Enter the Chinese subject name and press Enter to search.
- 3: Filter whether the subject belongs to
NSFW(Not Safe/Suitable For Work). Learn more aboutNSFWhere. - 4: Filter by the type the subject belongs to, whether it's an animation or something else.
- 5: Open the
Subject Sync Dialog. - 6: Go to the
Add Subject Page. - 7: Individual subject card. The top displays the original subject name, and the bottom displays the subject cover. Click to go to the corresponding
Subject Details Page.
Subject Sync Dialog
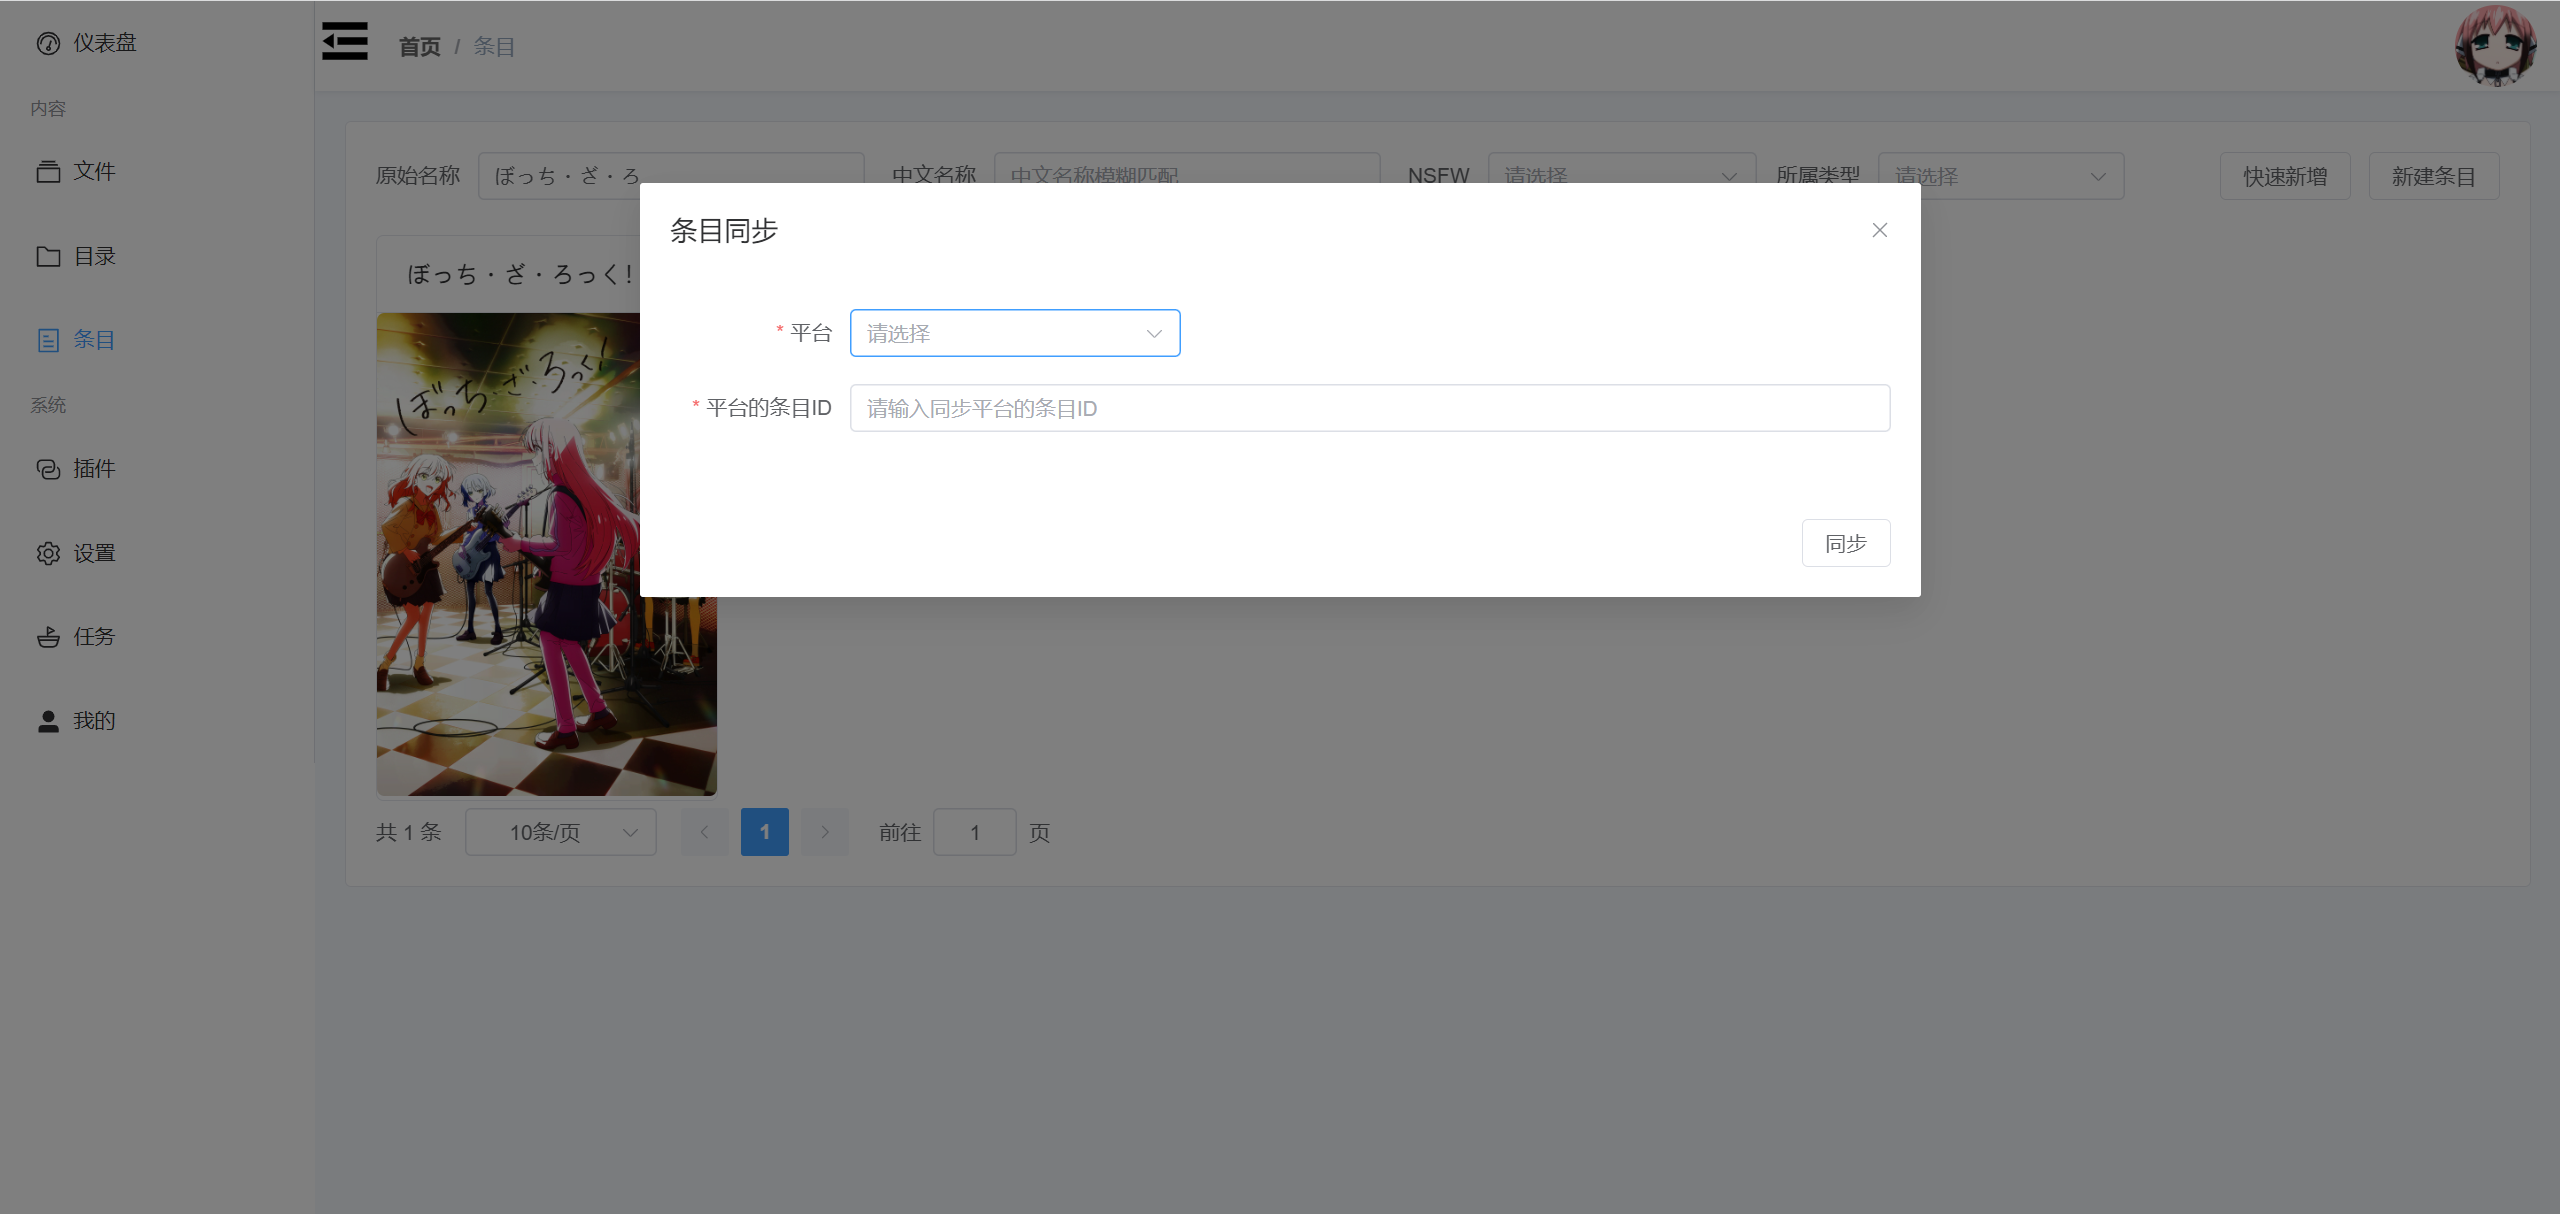
Clicking outside the dialog or the X can close it. If no subject synchronization implementation plugins are started, it will display a corresponding message instead of selectable options and input fields.
Add Subject Page
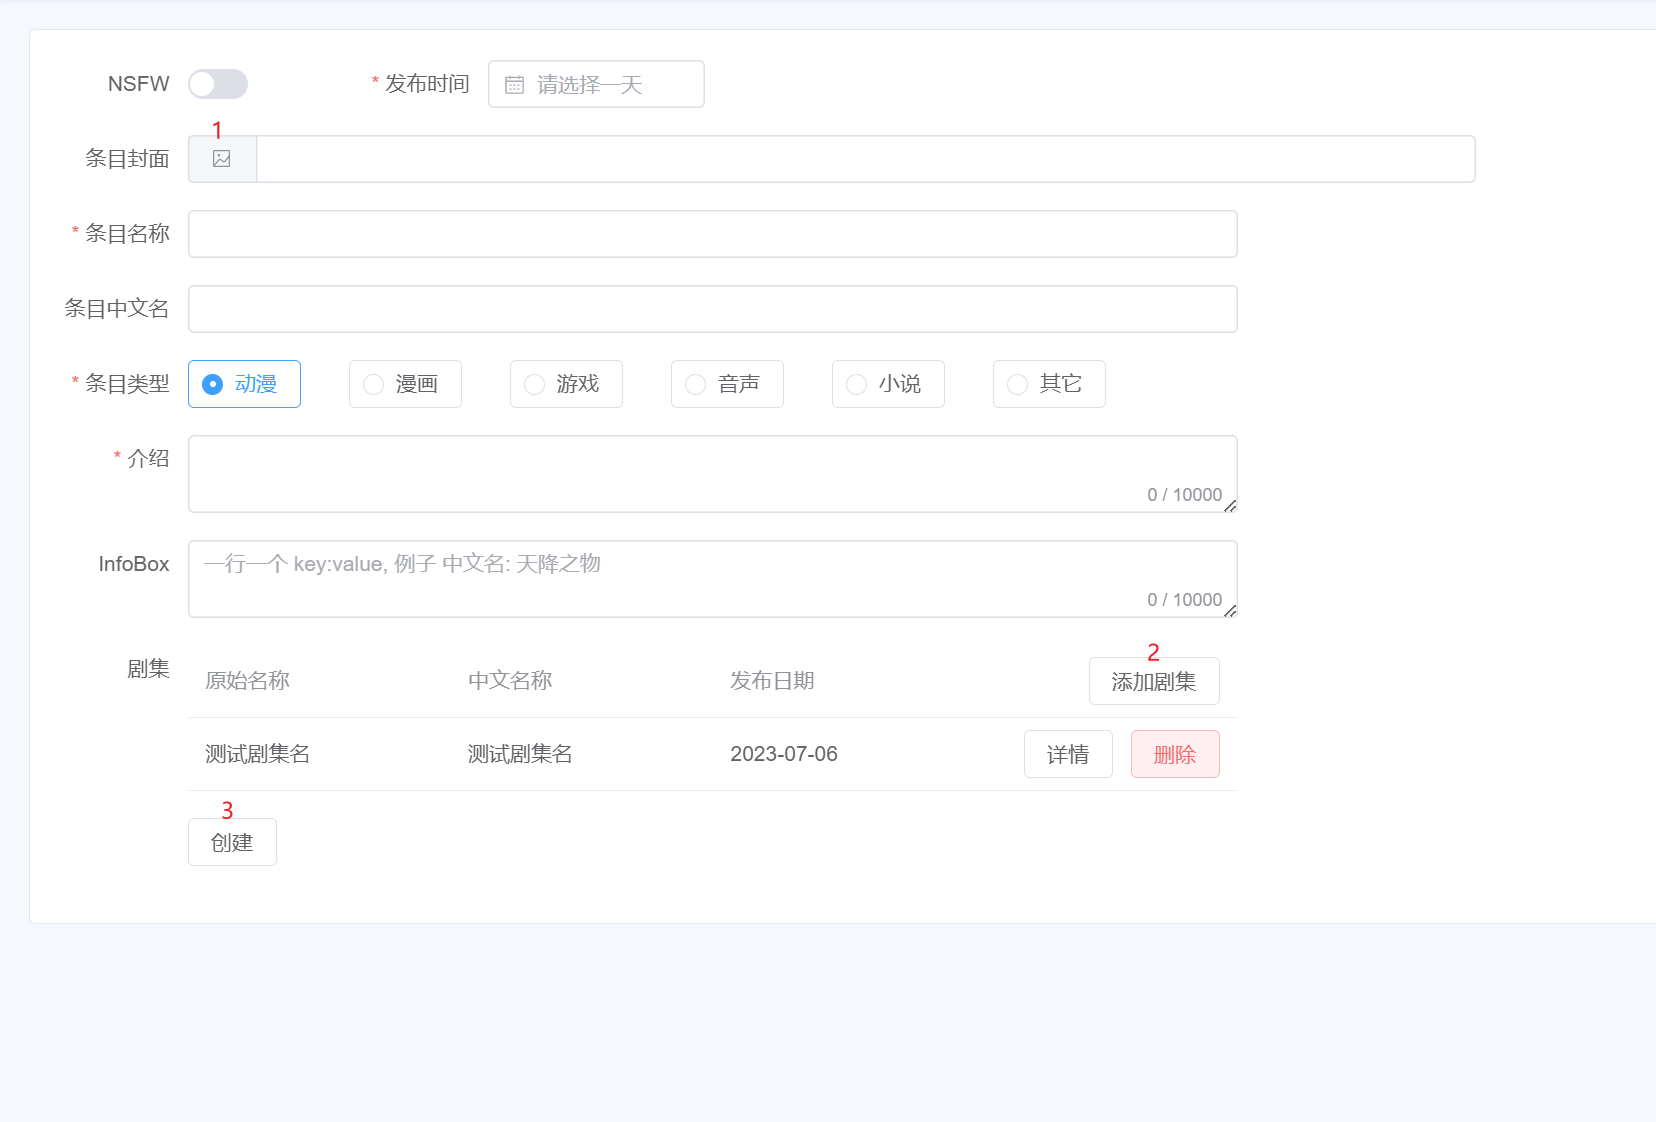
- 1: Click to open the
File Selection Dialog. - 2: Click to open the
Add Episode Dialog. - 3: Click the
Createbutton to submit.
File Selection Dialog
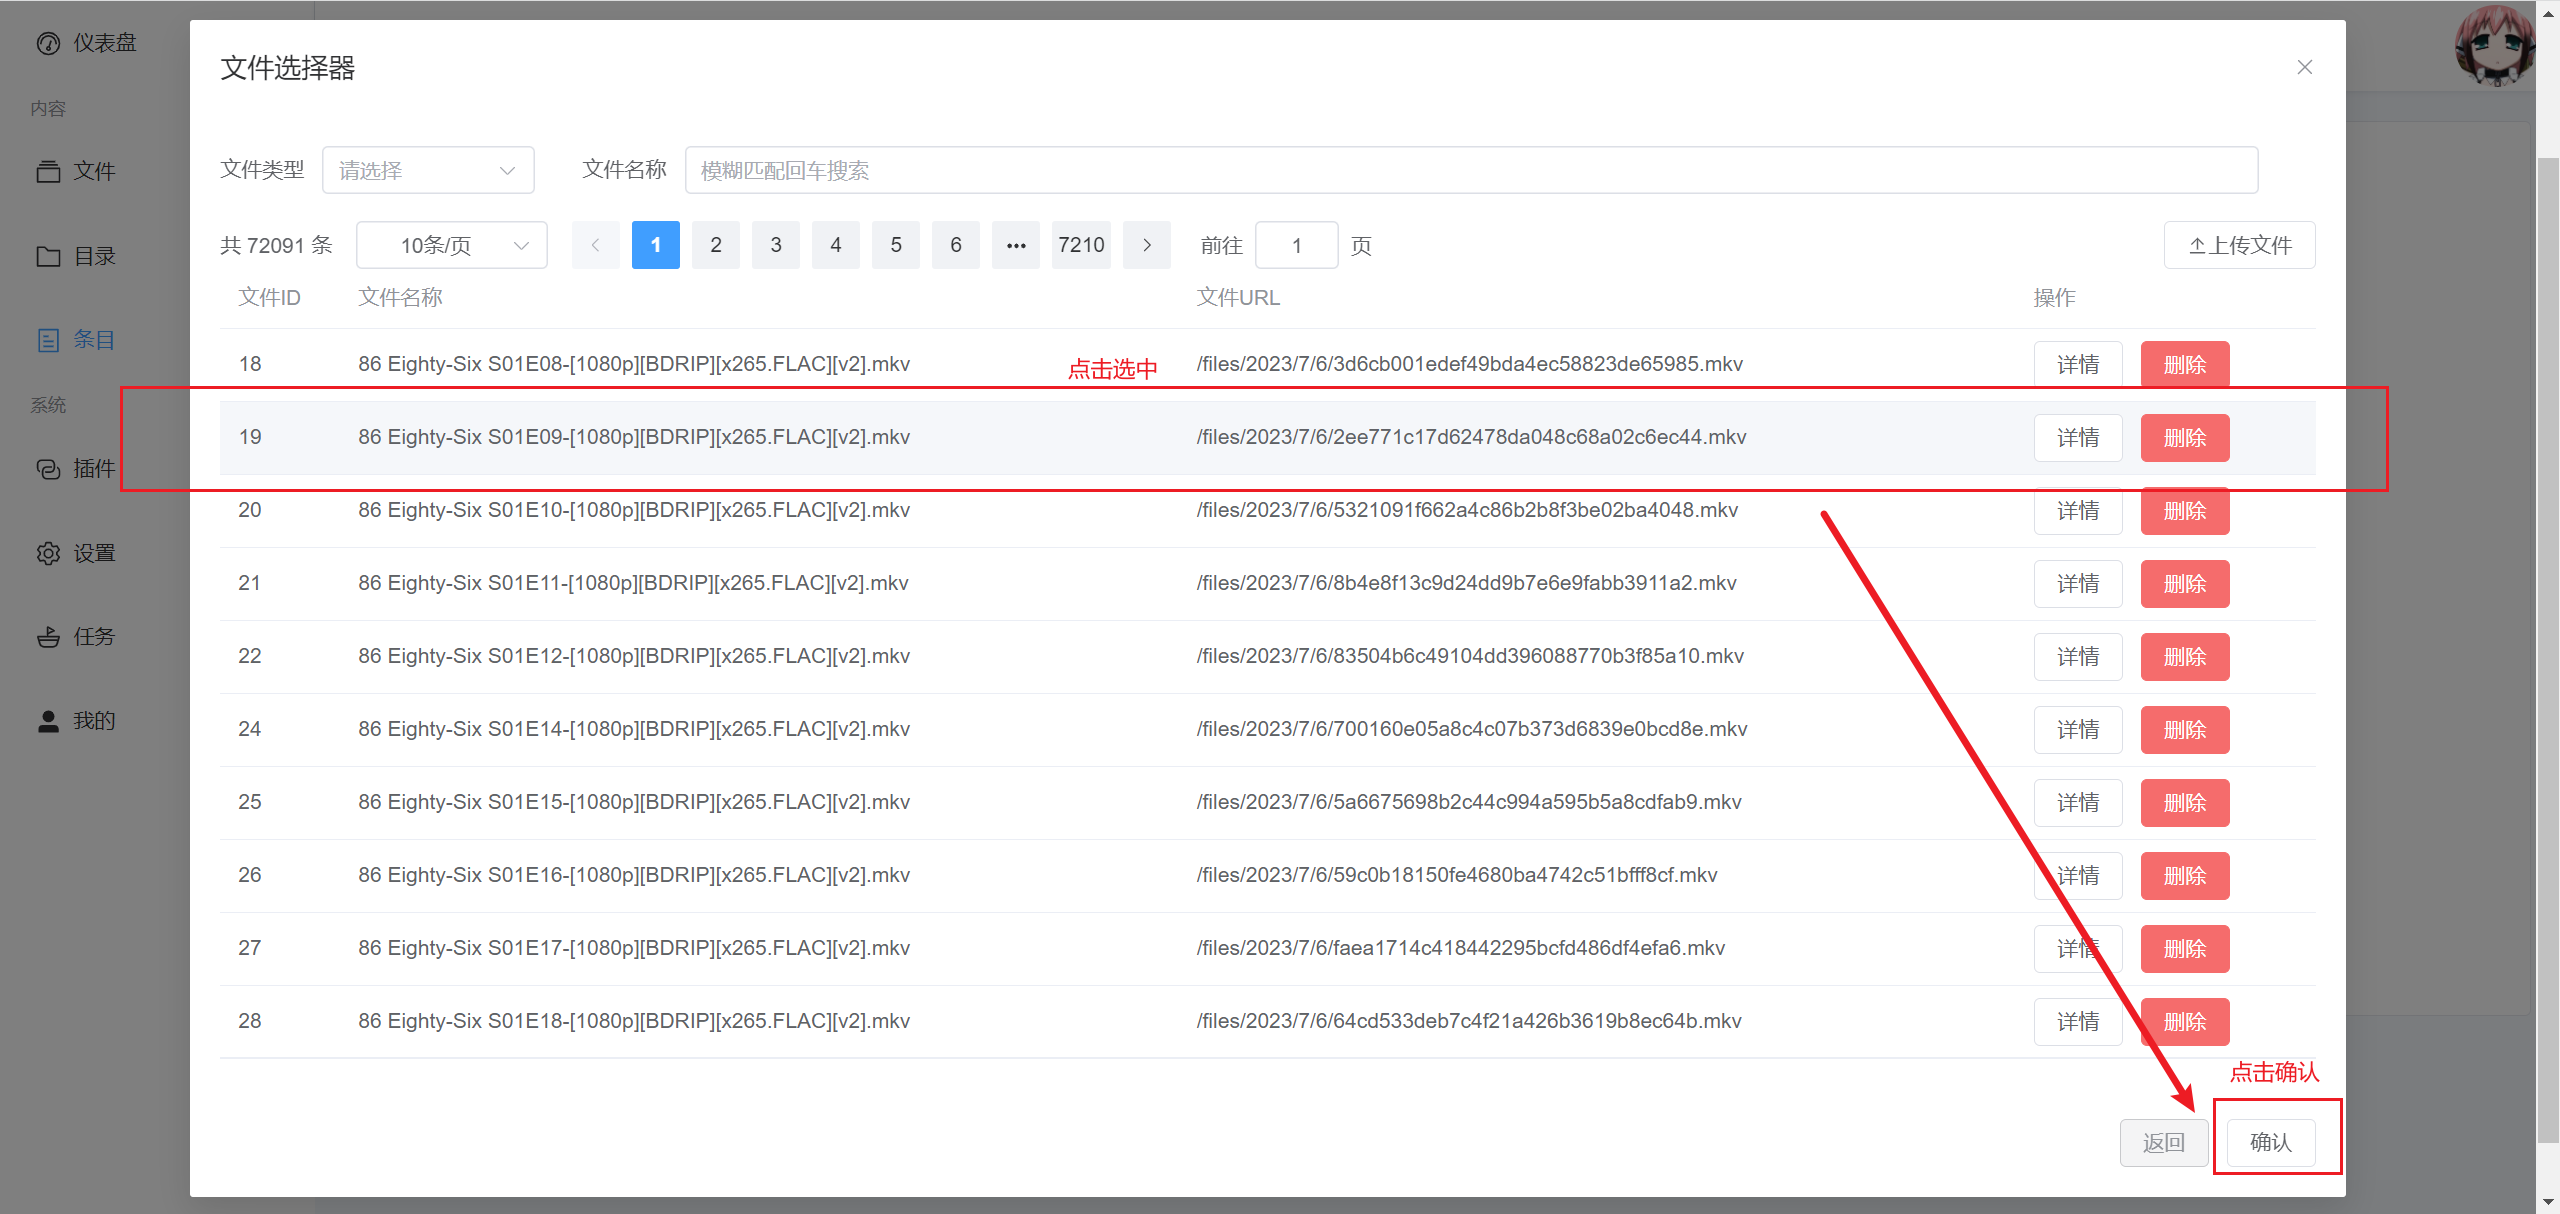
Click to select a single row. The selected row will have a different background color from the others. After selecting a file, click Confirm to fill the file URL into the Subject Cover input field.
At this point, the data is not saved to the server's database. You need to click the Create button to submit it together.
Add Episode Dialog
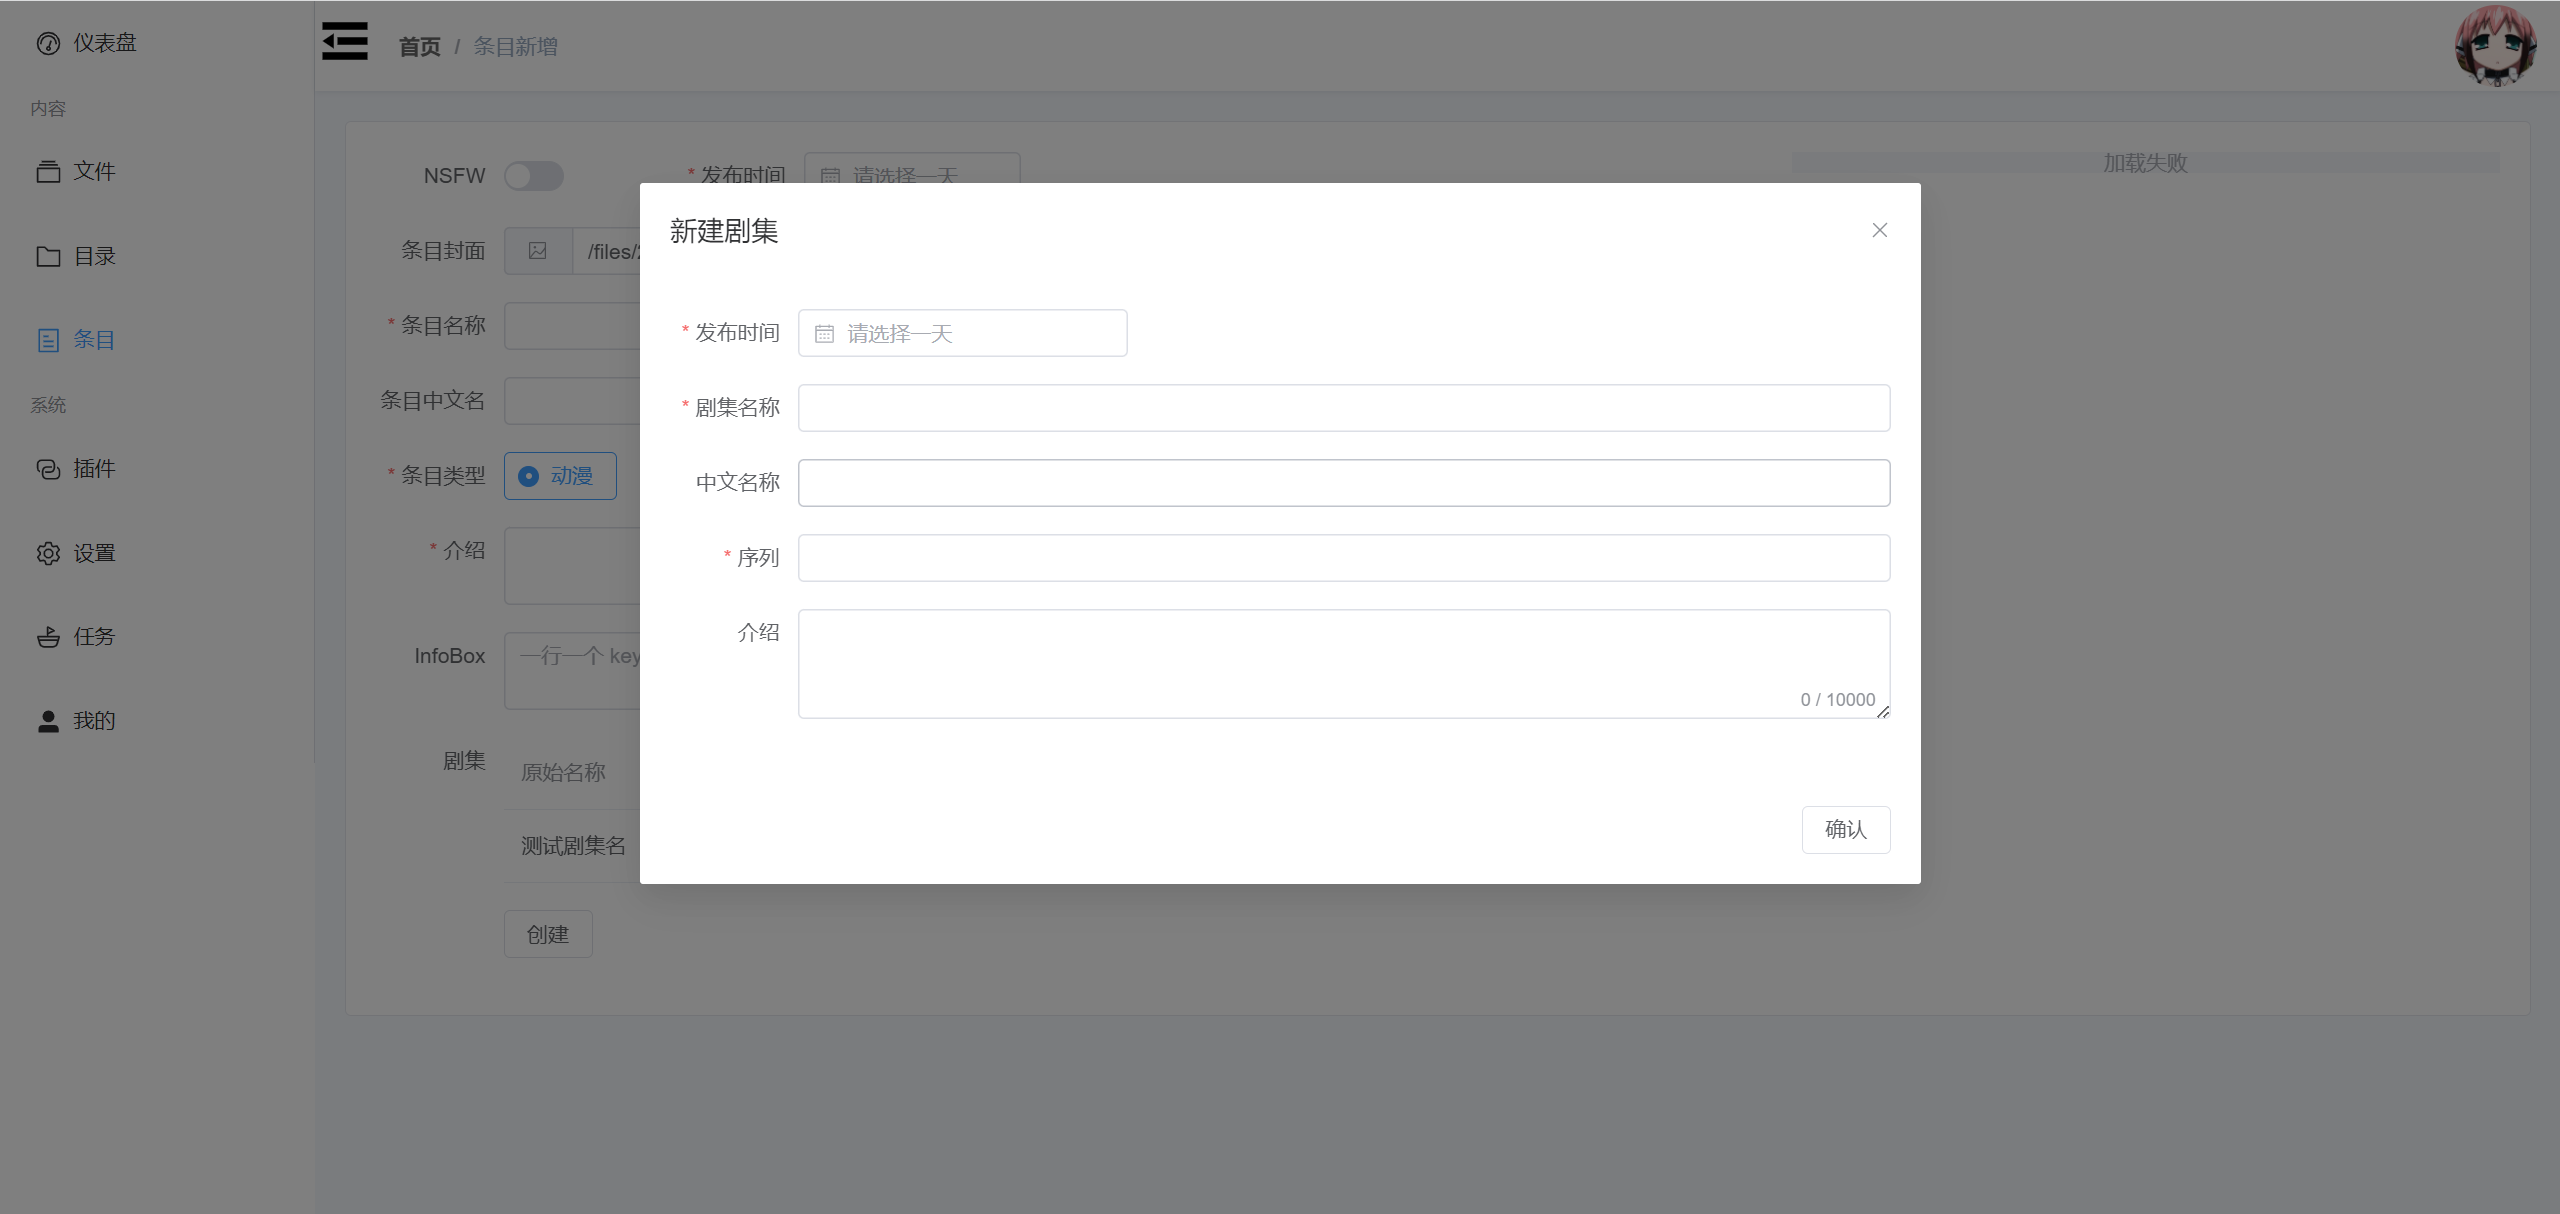
Enter the corresponding content. After clicking Confirm, a new record will be added to the Episodes table.
At this point, the data is not saved to the server's database. You need to click the Create button to submit it together.
Subject Details Page
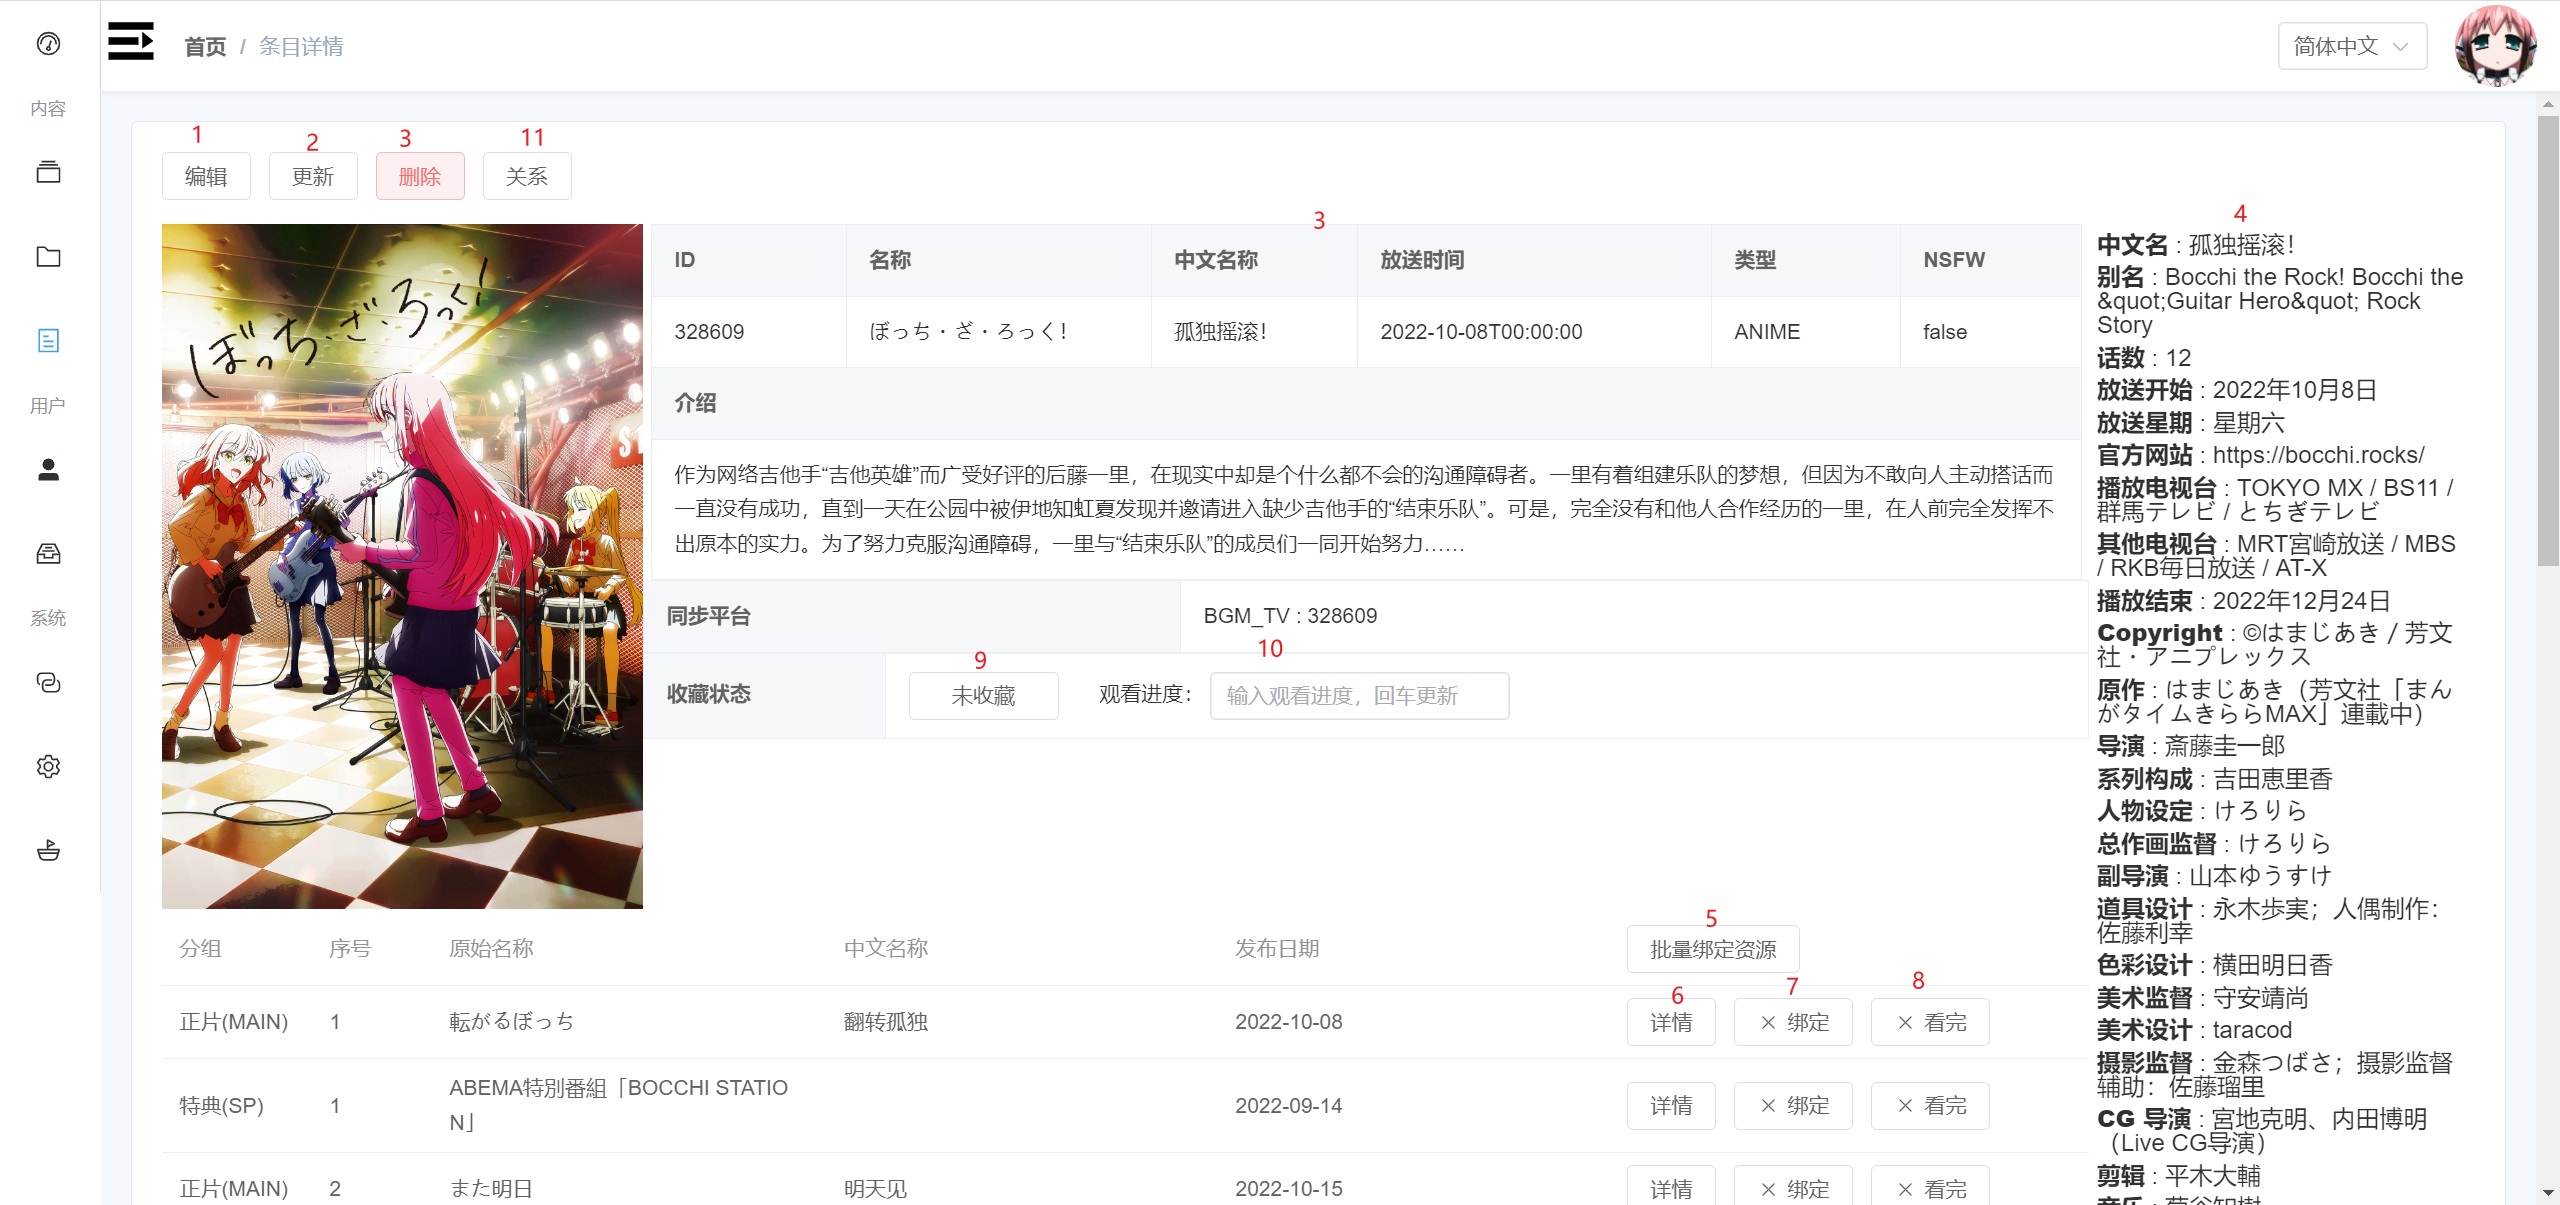
- 1: Go to the subject editing page. It's similar to adding a new subject, but with pre-filled data. You can make modifications and submit updates.
- 2: Delete the current subject.
- 3: Display the subject's cover, information, and episodes.
- 4: Display the subject's
InfoBox. - 5: Click to open the multi-selection dialog for files. After confirmation, it will match the selected files with episode numbers. The matching rule is: regular expression matching for
XXX[08]XXXX.XXXandXXXX 08 XXXX.XXX. - 6: Click to open the file episode details dialog. Alternatively, double-clicking on the current episode row will also open the dialog.
- 7: Click to open the file selection dialog for individual episodes. If a match is made, the button icon will be updated with a checkmark.
- 8: Mark the current episode as watched.
- 9: Favorite the current episode. After favoriting, it will appear in the menu under "Favorites."
- 10: Update the viewing progress of the subject's episodes.
- 11: Open the "Related Subjects" dialog.
Related Subjects Dialog
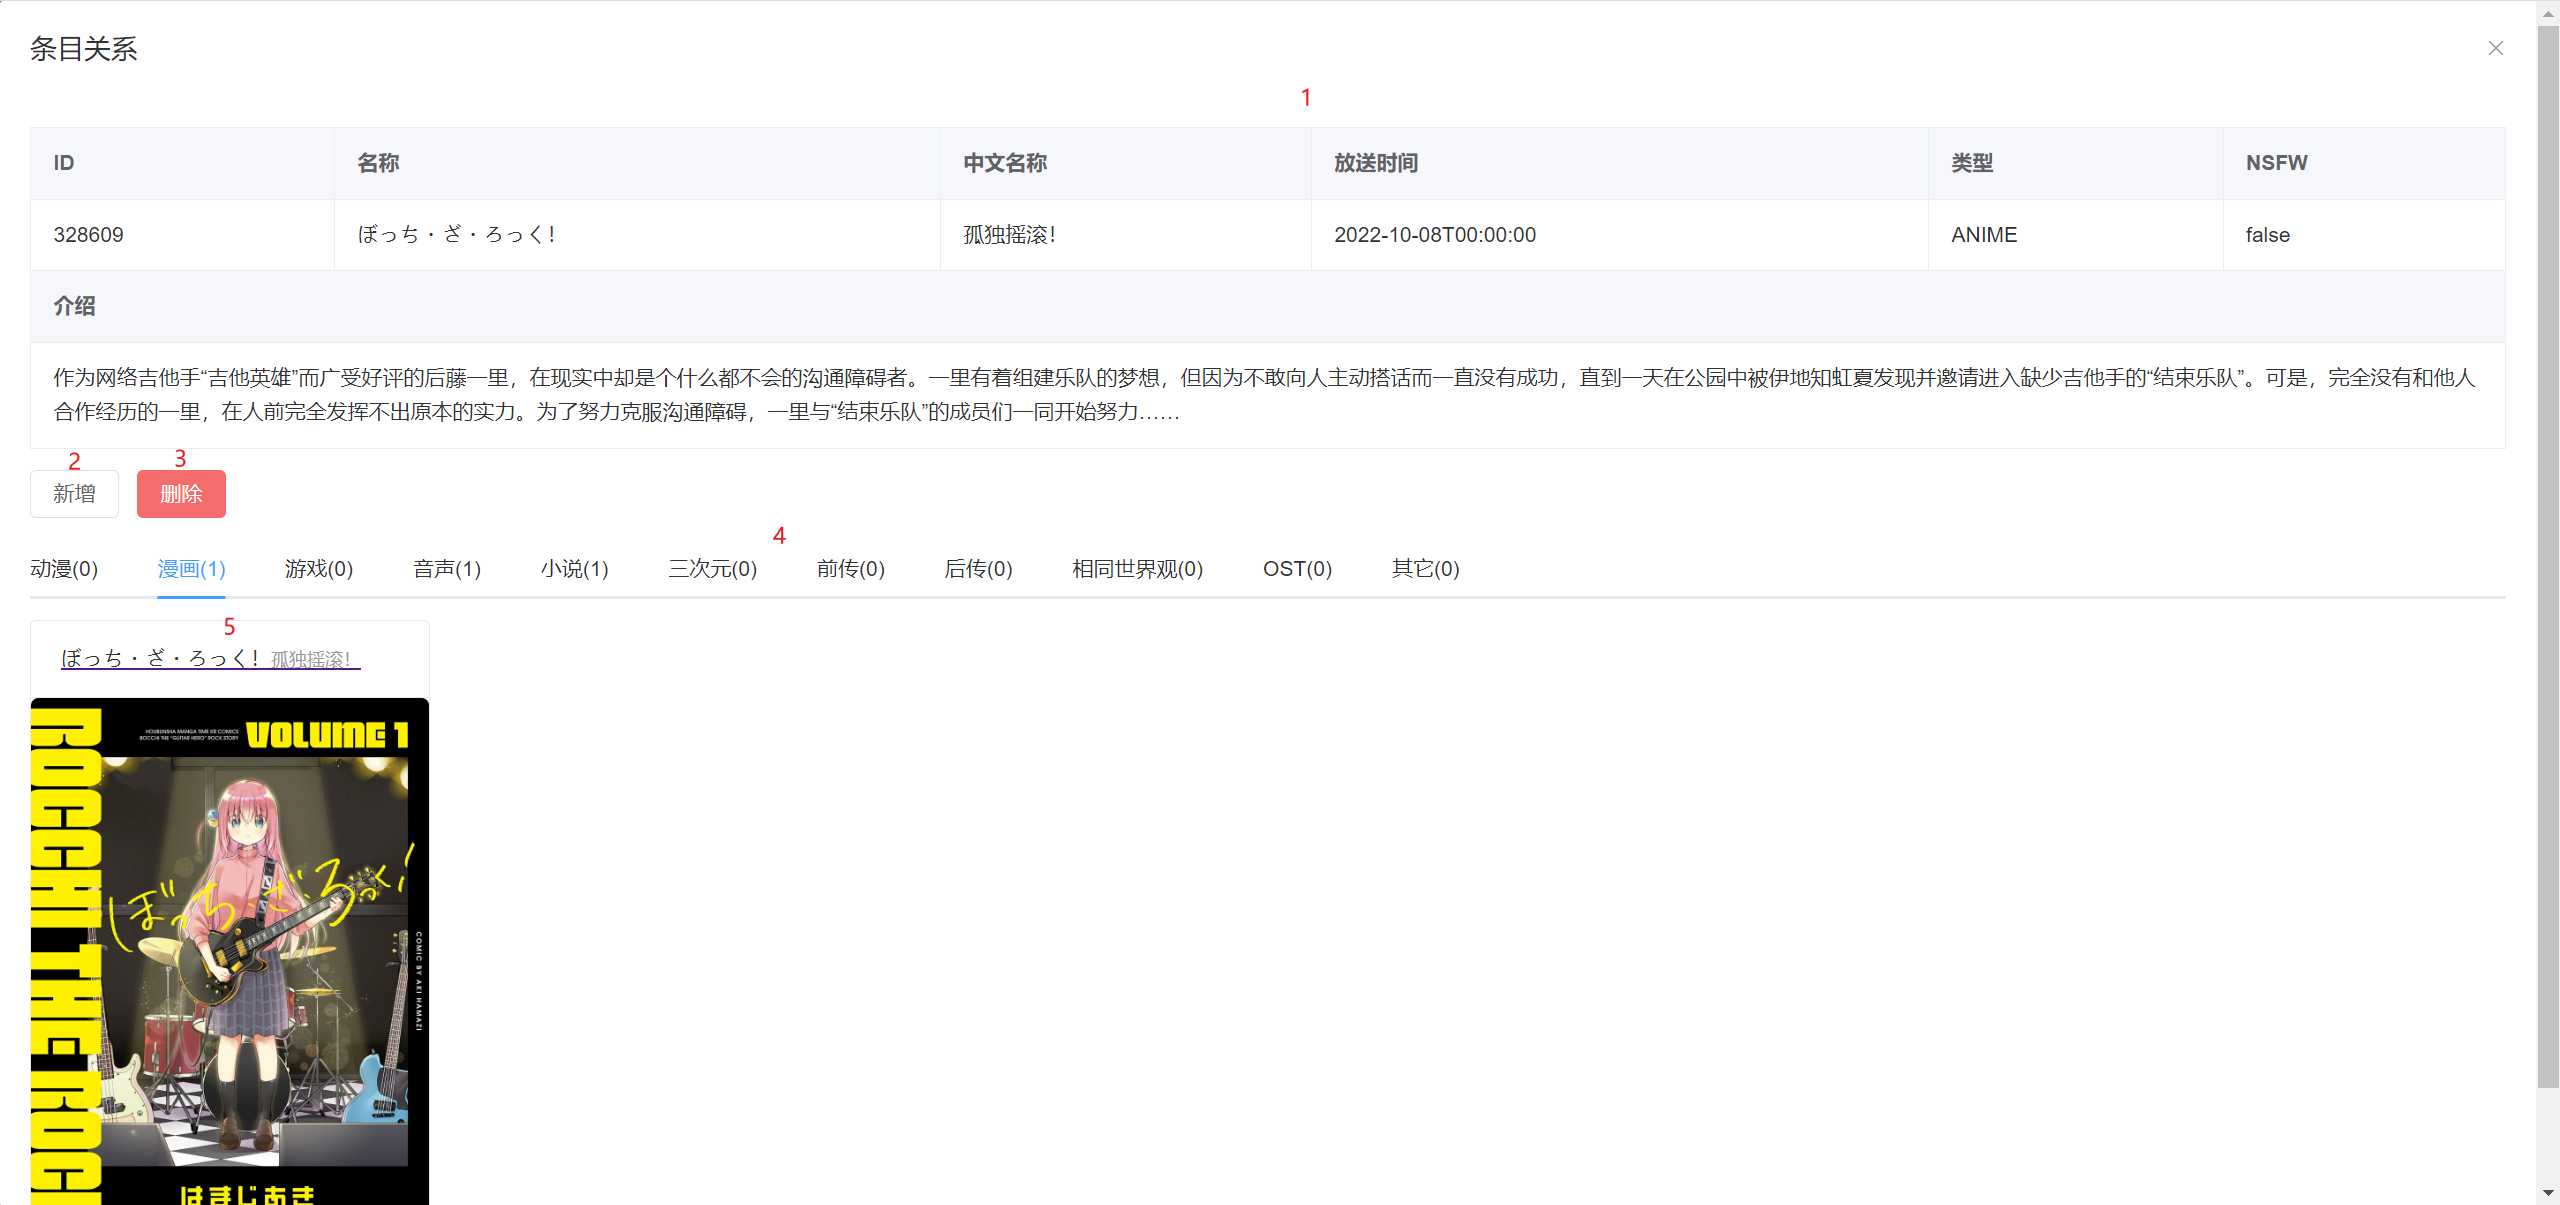
- 1: Main subject information.
- 2: Button to add new subject relationships. Click to open the "Add Subject Relationship" dialog.
- 3: Button to delete subject relationships. Click to open the "Delete Subject Relationship" dialog.
- 4: Display related subjects.
- 5: Cards for related subjects. Clicking will navigate to the details page of the corresponding subject.
Add Subject Relationship Dialog
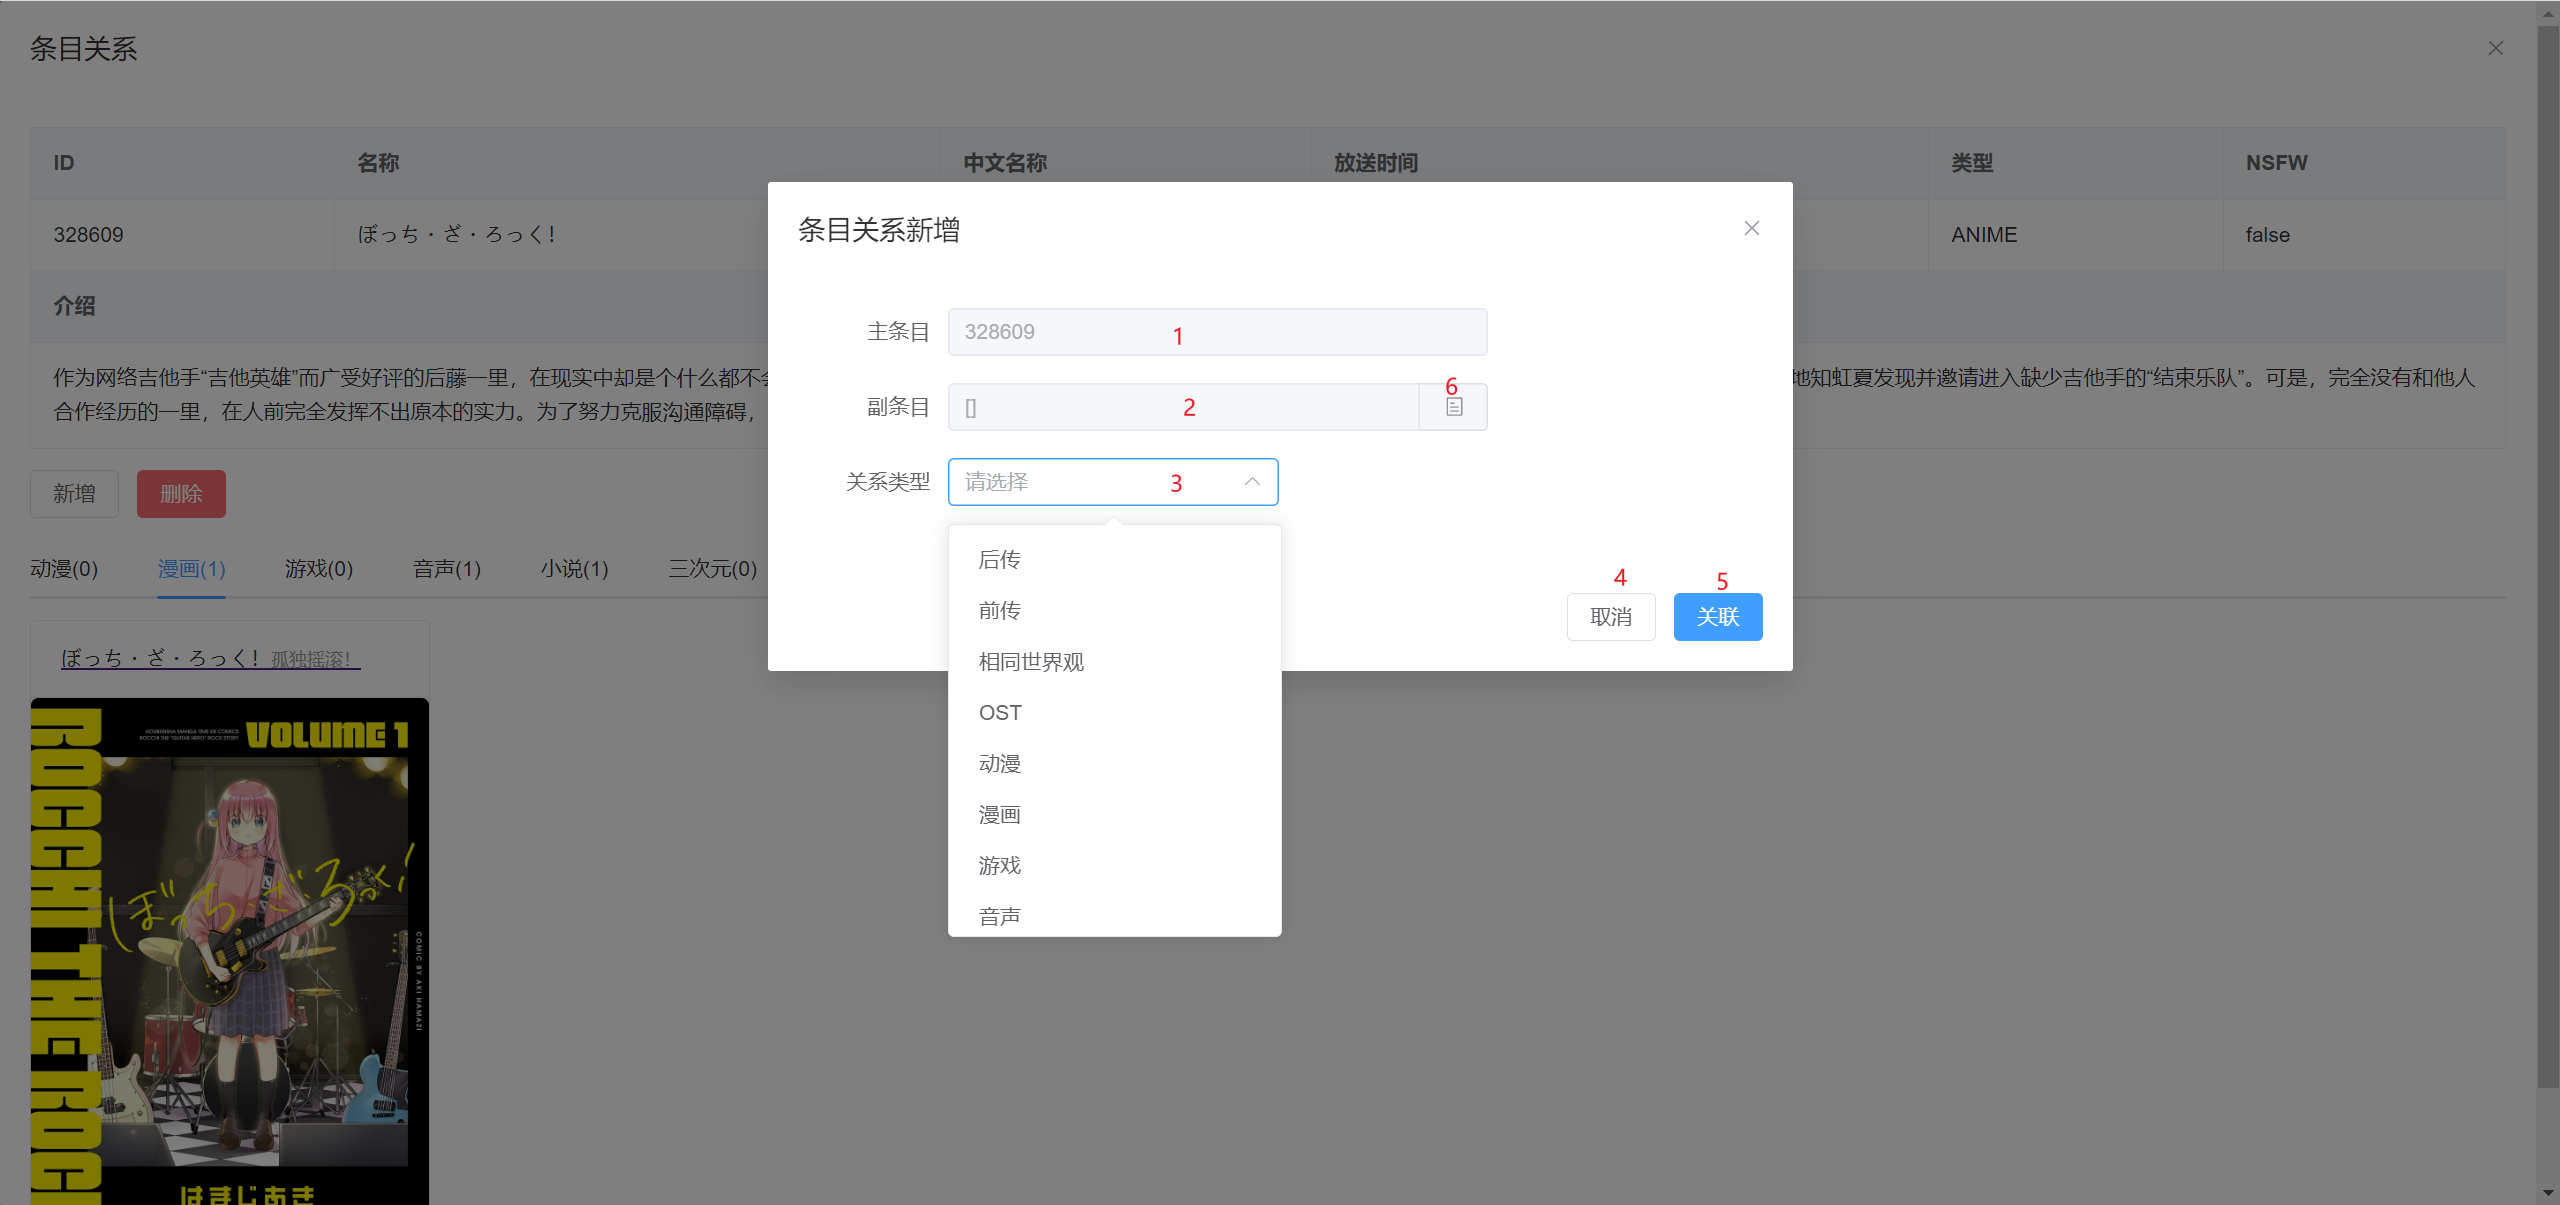
- 1: ID of the main subject (not editable).
- 2: Array of IDs for related subjects (not editable).
- 3: Dropdown menu to select the relationship between the main subject and related subjects.
- 4: Cancel button to close the dialog without submitting.
- 5: Associate button to submit the request to add related subjects.
- 6: Open the "Subject Selection Right Drawer" to choose specific subjects as related subjects.
Subject Selection Right Drawer
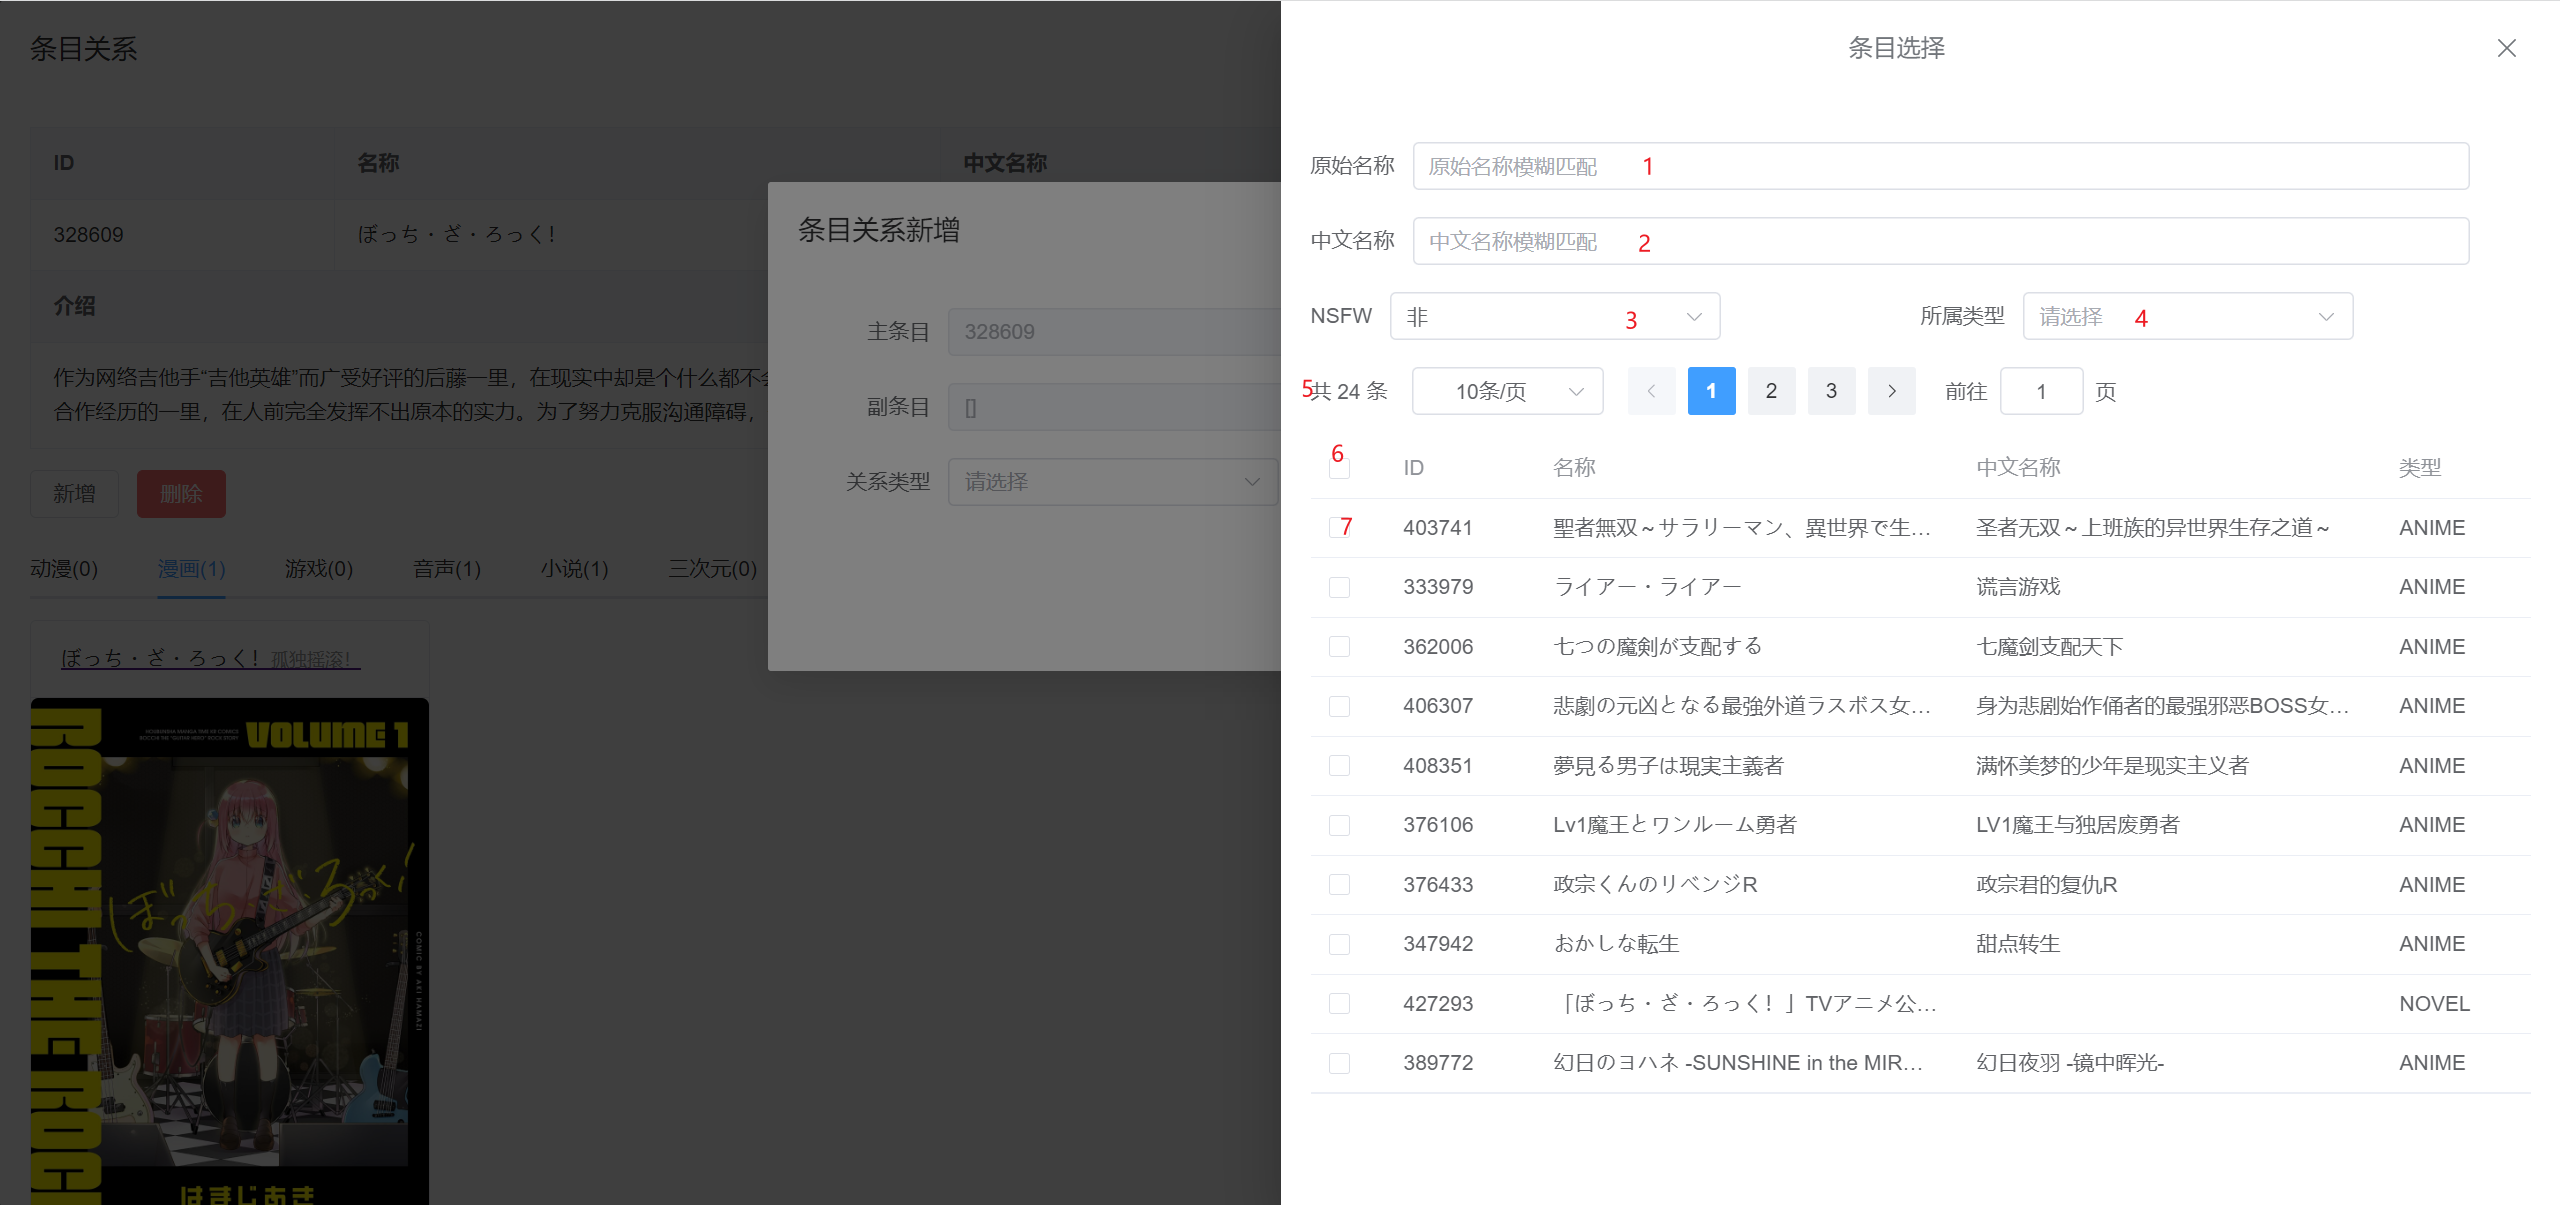
- 1: Enter the original subject name and press Enter to search.
- 2: Enter the Chinese subject name and press Enter to search.
- 3: Filter for whether the subject belongs to "NSFW."
- 4: Filter for the subject's type.
- 5: Pagination.
- 6: Select all on the current page.
- 7: Select individual rows.
After selecting subjects, click the dark area on the left or the X in the top-right corner of the drawer. The selected subjects will be filled into the "Related Subjects" box.
Delete Subject Relationship Dialog
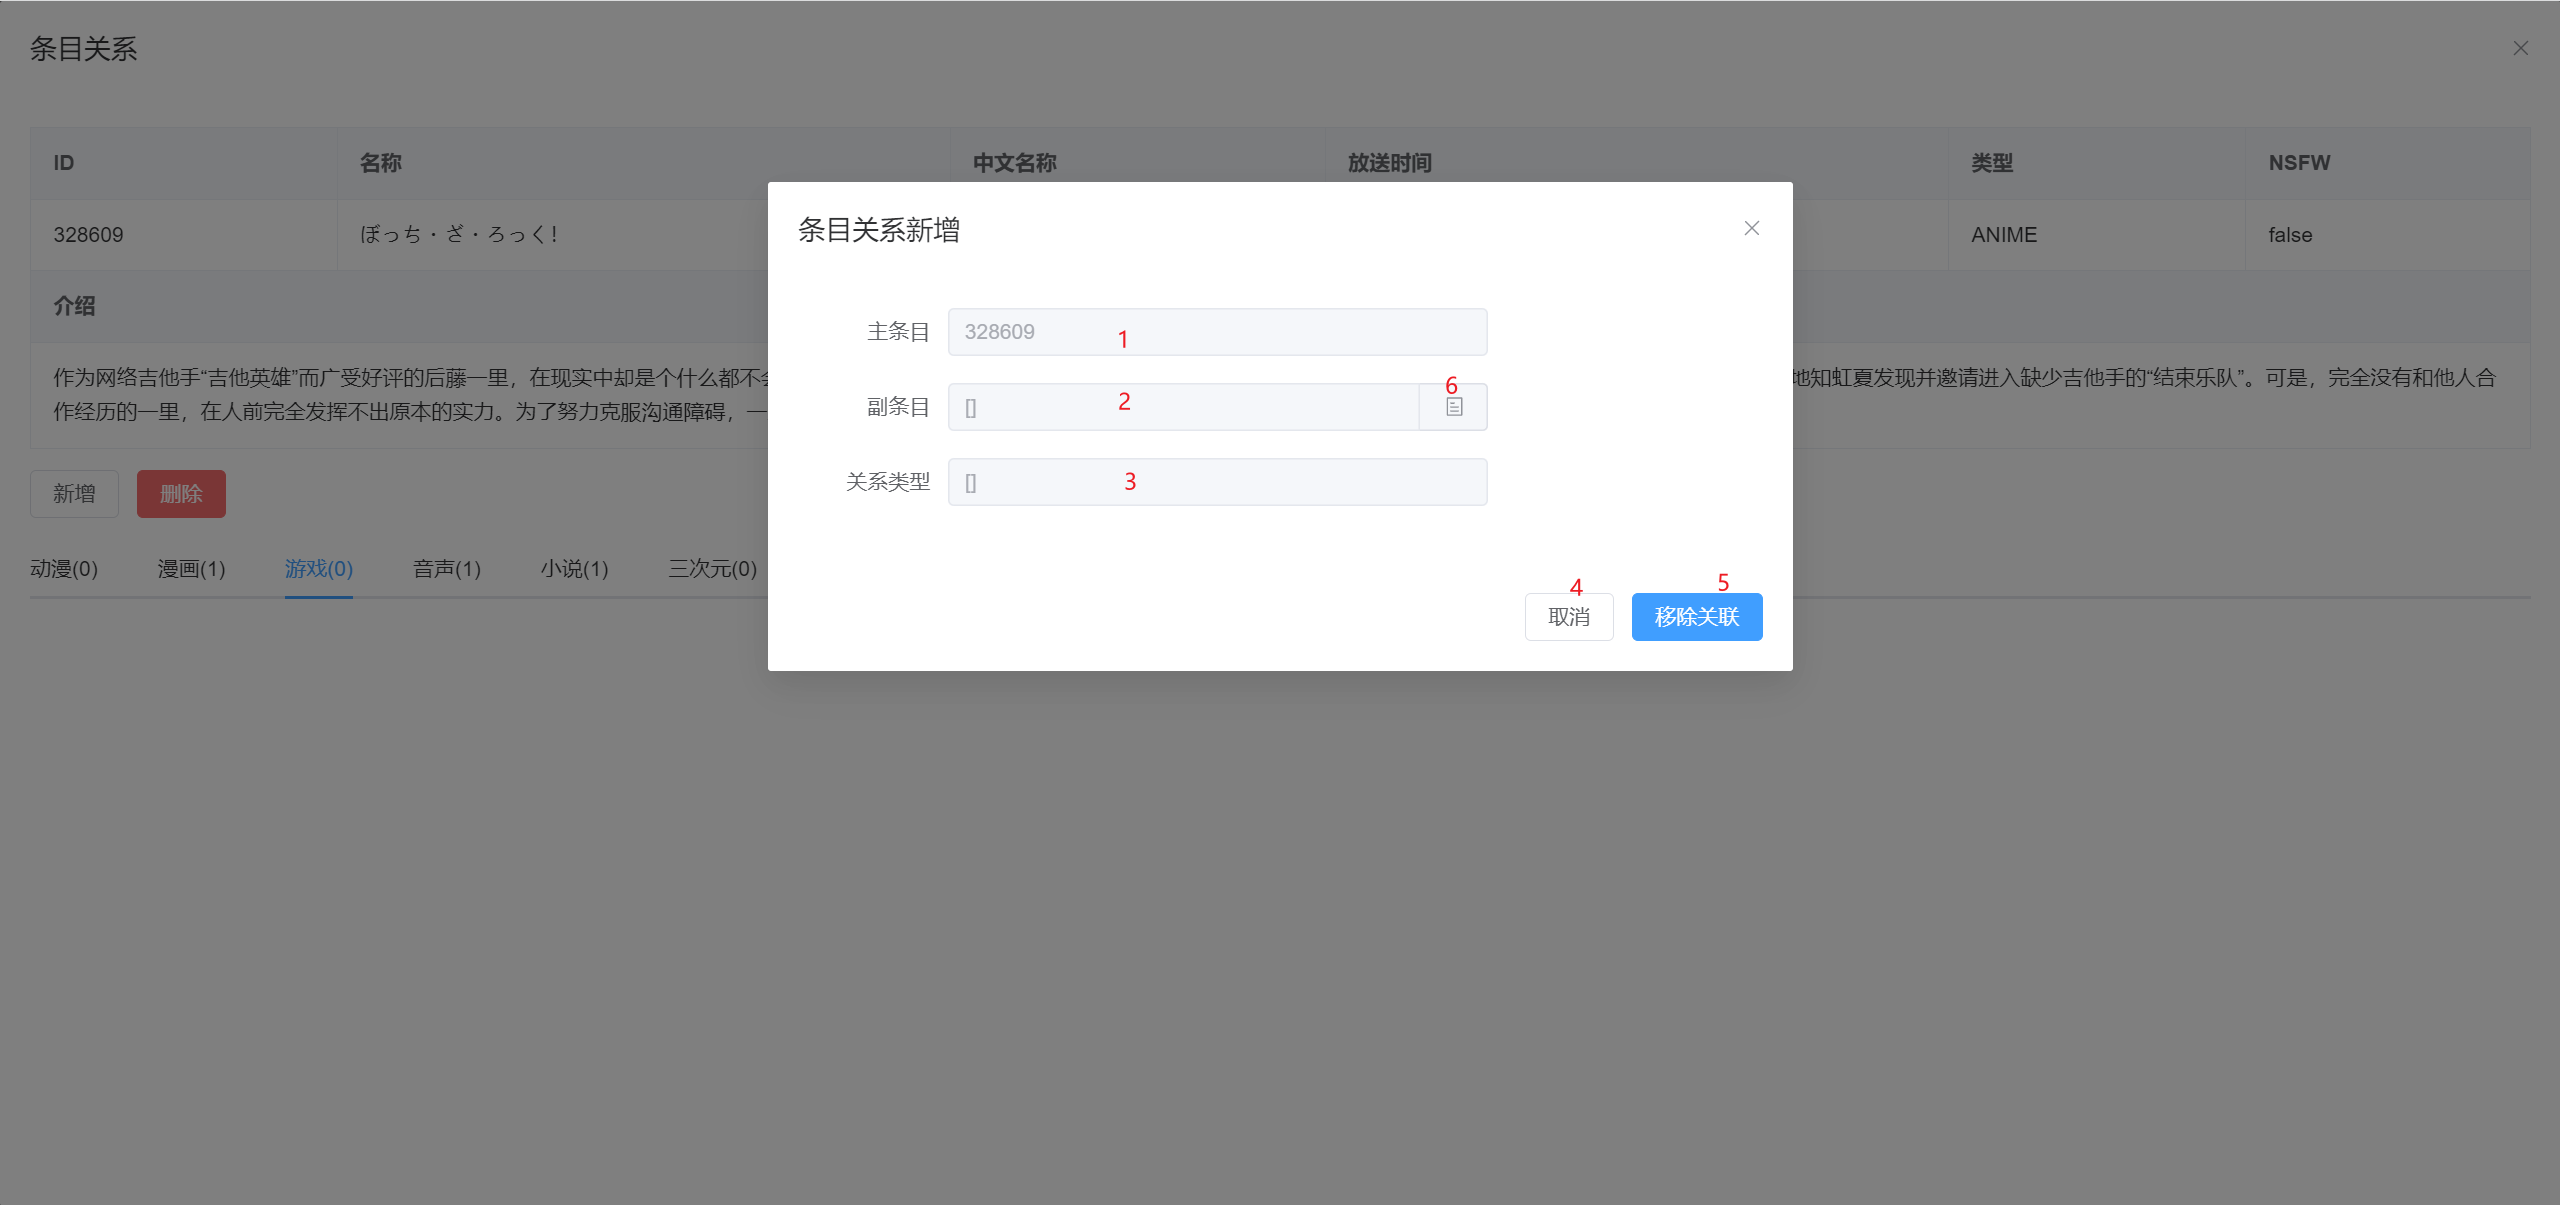
- 1: ID of the main subject (not editable).
- 2: Array of IDs for related subjects (not editable).
- 3: Type of the selected related subjects (not editable).
- 4: Cancel button to close the dialog without submitting.
- 5: Remove Association button to submit the request to remove related subjects.
- 6: Open the "Subject Selection Right Drawer" to choose specific subjects as related subjects. Unlike the "Subject Selection Right Drawer" mentioned above, this drawer will only display related subjects that are already associated with the current main subject.